The holiday season twinkles with an undeniable magic, a time when homes glow with warmth and families gather closer. But beyond the lights and carols, there's a quieter, often more cherished magic unfolding: the joy of creating together. This is where Dibujos de Navidad para Manualidades—Christmas drawings for crafts—truly shine, offering the perfect starting point for hands-on activities that transform simple materials into treasured decorations and unforgettable memories.
Imagine the delight of your children, or even just your own inner child, bringing festive visions to life with glue, glitter, and a dash of imagination. These aren't just crafts; they're an invitation to slow down, connect, and infuse your home with personalized holiday spirit. From cheerful reindeers to sparkling snowmen, the journey from a simple drawing to a tangible decoration is a heartwarming adventure.
At a Glance: Crafting Joy This Christmas
- Spark Creativity: Christmas drawings provide a fun, accessible entry point for all ages to engage in artistic expression.
- Family Bonding: Manualidades are perfect for quality family time, fostering collaboration and shared experiences.
- Personalized Decor: Create unique ornaments, gifts, and home decor that reflect your family's personality.
- Skill Building: Develop fine motor skills, problem-solving, and the satisfaction of seeing a project through.
- Simple Materials: Many crafts use readily available, inexpensive items you likely already have around the house.
- Lasting Memories: The process of making is as valuable as the finished product, creating traditions and stories.
Beyond the Sketch: Why Christmas Crafts Are Essential Holiday Magic
In an age of instant gratification, the deliberate process of creating something with your hands holds a special power. Christmas crafts, often inspired by simple drawings, offer a delightful antidote to the holiday rush. They provide a tangible way to celebrate the season, encouraging patience, creativity, and a sense of accomplishment.
Think about it: that won't just be an ornament on your tree; it will be the ornament your child lovingly painted, perhaps a little wobbly, but bursting with character. Or the festive garland you and your partner crafted on a cozy winter evening. These projects become more than mere decorations; they're tiny time capsules, holding the laughter, conversations, and quiet focus of their creation. They're also an excellent way to introduce children to the concept of following instructions, problem-solving when things don't go as planned, and understanding basic design principles. For even more inspiration and techniques, delve into a broader understanding of all about Christmas drawings and how they can elevate your holiday crafting.
The Canvas of Imagination: What Makes a Great Christmas Drawing for Crafts?
Before the glue gun comes out or the scissors start snipping, there's often a drawing—either a quick sketch from your own imagination, a printed template, or a mental blueprint. What makes an ideal Christmas drawing for crafting?
It’s often about simplicity, iconic imagery, and adaptability. A good craft drawing:
- Features Recognizable Elements: Santa, reindeer, snowmen, stars, trees, candy canes—these instantly evoke the holiday spirit.
- Has Clear Outlines: Easy to cut, trace, or paint within. Complex details can be added later with markers or embellishments.
- Is Scalable: Can be easily enlarged or shrunk to fit different project sizes.
- Offers Creative Freedom: Serves as a jumping-off point, allowing for personalization with colors, textures, and extra adornments.
Whether you're drawing freehand, tracing a favorite character, or printing out one of the many fantastic free templates available online (websites like DLTK-Ninos.com are a treasure trove for this!), the drawing sets the stage for the manualidades. It's the blueprint for your holiday masterpiece.
Setting Up Your Workshop: Essential Supplies for Festive Crafting
One of the most appealing aspects of Christmas crafts is that you don't need a professional art studio. Many projects thrive on common household items and a few basic craft supplies. Think of it as a creative scavenger hunt before the main event!
The Core Crafting Toolkit:
- Paper & Cardboard: The unsung heroes! White paper for drawing, colored paper for cutting shapes, and sturdy cardstock or thin cardboard for structural support. Glitter paper adds instant sparkle.
- Scissors: Good quality, child-safe scissors for little hands, and sharp adult scissors for precise cuts.
- Glue: PVA glue (white school glue) for most paper crafts, a glue stick for quick adhesion, and a hot glue gun (adult supervision essential!) for stronger, faster bonds, especially with 3D projects or heavier materials.
- Paints & Brushes: Acrylic paints for bright, opaque colors; kid-friendly washable paints for easy cleanup. Various brush sizes are helpful.
- Markers & Pencils: Permanent markers for outlining and details, colored pencils for shading, and regular pencils for sketching.
- Everyday Treasures: Empty paper rolls (toilet paper/paper towel), paper plates, old socks, bottle caps, and popsicle sticks are fantastic, free building blocks for countless crafts.
Adding Sparkle & Personality: - Cotton Balls/Wool: Perfect for snow, Santa's beard, or fluffy borders.
- Googly Eyes: Instantly bring characters to life.
- Pom-Poms: Versatile for noses, buttons, or decorative accents.
- Glitter & Sequins: Essential for adding that festive shimmer.
- Ribbon & String: For hanging ornaments, bows, or creating garlands.
- Felt & Fabric Scraps: Add texture and warmth to your creations.
- Buttons & Beads: Extra embellishments for unique touches.
Gathering your materials can be part of the fun. Lay everything out, let your family see the possibilities, and watch the ideas start to flow!
Bring Your Drawings to Life: Step-by-Step Craft Projects
Now for the exciting part: turning those drawings and materials into actual Christmas decorations! These detailed guides will walk you through some beloved holiday crafts, perfect for families looking for creative engagement.
Iconic Characters & Classic Motifs
These projects focus on recognizable Christmas figures, often starting with a simple drawn shape and building layers of personality.
Rudolph the Red-Nosed Reindeer (Paper & Bells)
This charming Rudolph craft is all about layering paper shapes to create a whimsical 3D effect, complete with jingly bells.
What You'll Need:
Paper (brown, beige, red), red and blue cardstock, scissors, red ribbon, small jingle bells, glue, pencil, white paint (optional), circular object for tracing (optional), Rudolph template (optional).
Your Crafting Journey:
- Shape It Up: If using a template, print and cut out the shapes for Rudolph's main oval head/body, smaller beige snout oval, antlers, ears, and the iconic red nose. If drawing freehand, sketch these shapes on brown, beige, and red paper, then carefully cut them out.
- Assemble the Face: Glue the beige oval onto the lower part of the larger brown oval (this forms the snout). Position and glue the ears to the top sides of the large brown oval, peeking out.
- Attach Antlers: Glue the antlers to the top of the brown oval, behind the ears, ensuring they stand tall.
- Eyes & Nose: Glue googly eyes (or draw them with black marker). For the red nose, cut out a circle from red paper or cardstock. For a fun 3D effect, cut two thin strips of red paper, fold them accordion-style, and glue them to the back of the nose and then to the snout. This makes the nose pop out!
- Add the Jingles: Thread small jingle bells onto lengths of red ribbon. Tie or glue these ribbons to the antlers, letting the bells dangle freely.
- Finishing Touches: Use white paint or a marker to add small dots to Rudolph's eyes for sparkle, if desired.
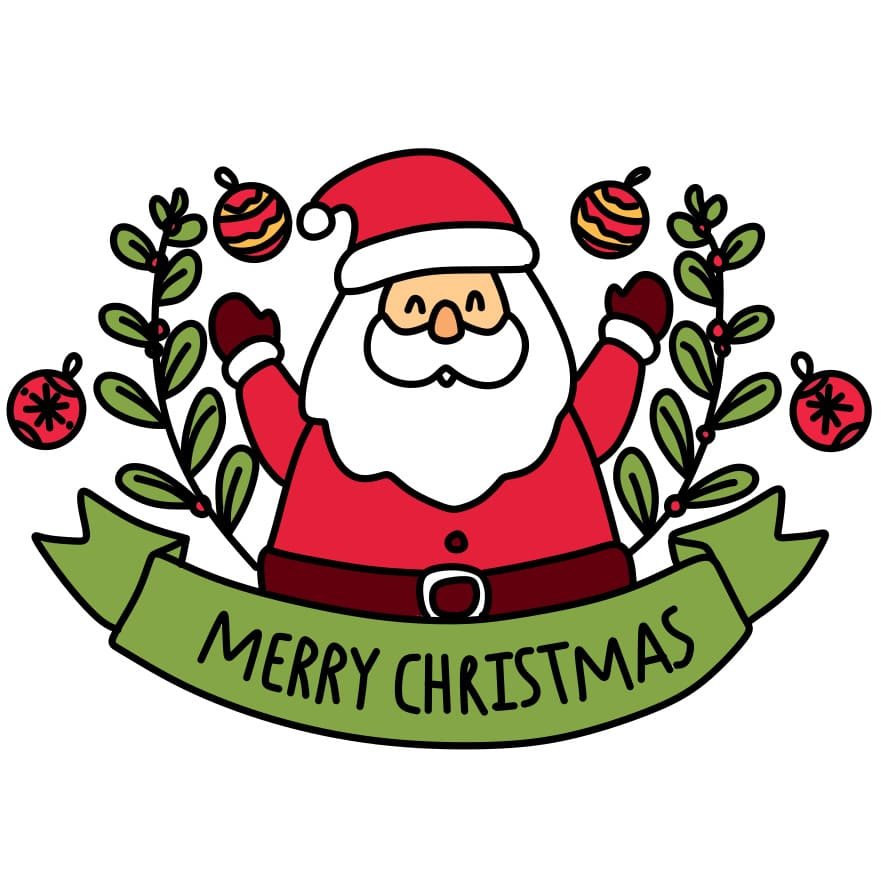
Santa Claus (Paper Plate Magic)
Transform a simple paper plate into a jolly Santa face, complete with a fluffy beard, perfect for hanging on a door or wall.
What You'll Need:
1 paper plate, child-friendly paint (red, skin tone), cotton balls (optional), white paper, PVA glue, scissors, paintbrush, pencil.
Your Crafting Journey:
- Paint the Hat: Paint the upper half of the paper plate red to create Santa's hat. Leave the bottom half unpainted (this will be his face). Let it dry completely.
- Craft the Beard: Cut thin strips of white paper. Using a pencil, curl each strip by wrapping it around the pencil and gently pulling it off.
- Build the Beard: Glue these curled paper strips along the bottom edge of the unpainted face section, creating layers for a voluminous beard. For extra fluff, you can also use cotton balls, gluing them in layers.
- Features: Cut a small red circle for Santa's nose and glue it in the center of his face. Draw or glue on eyes just above the nose.
- Hat Details (Optional): Add a white cotton ball to the tip of Santa's hat and a strip of white paper or cotton along the rim for a fluffy finish.
Festive Badges & Pins (Recycled Bottle Caps)
Give discarded bottle caps a new life by turning them into unique Christmas pins or ornaments. These are fantastic for personalized gifts.
What You'll Need:
3 metal bottle caps per character, fine sandpaper, spray paint or nail polish, permanent markers, glitter (optional), strong glue or hot glue, thin string/cord (optional), fabric scraps, small needle/awl (optional).
Your Crafting Journey:
- Prep the Caps: Lightly sand the inside and outside of the bottle caps to help the paint adhere. Paint them with spray paint or nail polish, choosing colors that will match your character (e.g., white for a snowman, red for Santa). Let them dry thoroughly.
- Draw Your Character: On each cap, draw a section of a Christmas character using permanent markers. For instance, the top cap could be a head, the middle a torso, and the bottom the legs or base. Think vertically for characters like snowmen or Santa.
- Sparkle (Optional): Add glitter to parts of your drawing while the paint is still tacky, or apply with a thin layer of glue.
- Join Them Up: Once dry, carefully glue the caps together, stacking them vertically to form the complete character. For a more robust connection, especially if you want them to swing a bit, you can carefully pierce small holes and thread string through them (adult supervision for piercing!).
- Embellish: Use small fabric scraps to create tiny hats, scarves, or other accessories, gluing them onto your bottle cap figures.
Miniature Worlds & 3D Creations
These projects move beyond flat drawings, inviting you to build and construct, adding depth and dimension to your Christmas decor.
Enchanting Mini Shop Window (Popsicle Sticks)
Create a delightful miniature Christmas scene, perfect for showcasing a tiny photo or small festive ornament. While the original description mentioned a "train ornament," the detailed steps clearly describe a shop window or house frame, which is a wonderful craft in itself!
What You'll Need:
Popsicle sticks (various sizes), thin cardboard, strong glue (hot glue works best for speed), acrylic paint, paintbrushes, permanent markers, scissors, mini ornaments/embellishments, small photo, thin string/ribbon, ruler, pencil.
Your Crafting Journey:
- Build the Base: On a piece of thin cardboard, arrange popsicle sticks to form a rectangular frame for your "shop window." Glue them securely.
- Define the Window: Use a few central popsicle sticks to create a smaller inner rectangle within your frame—this will be your "window" or "doorway."
- Craft a Sign: Take a smaller popsicle stick or a piece of cardboard and set it aside; this will be your shop sign.
- Optional Awning: For a shop awning, glue several smaller popsicle sticks together at an angle to create a small roof-like structure.
- Paint Your Structure: Paint the entire popsicle stick structure in festive colors (e.g., a cozy cottage brown, a snowy white, or a vibrant red). Paint your separate sign stick.
- Personalize the Sign: With a permanent marker, write the name of your "shop" (e.g., "Santa's Toys," "Elf Workshop," or your family name) on the painted sign. Glue it above your window.
- Add a View: On the back of your frame, glue a small photo (a family picture, a winter scene, or a festive image) so it appears through the "window."
- Decorate: Embellish your mini shop with tiny ornaments, glitter, cotton "snow," or miniature wreaths. Attach a piece of string or ribbon to the top for hanging.
Note on "Train Ornament": The description for the "train ornament" with popsicle sticks aligns more closely with creating a miniature house or frame for a photo. This versatile technique is excellent for various 3D structures, not just trains. By arranging popsicle sticks, you can build frames, miniature houses, or even abstract sculptures, making it a highly adaptable craft for any Christmas drawing. Feel free to adapt this to a train shape if you prefer, but the foundational technique of building a stick frame remains.
Layered 3D Christmas Trees (Paper & Sparkle)
Create a freestanding, dimensional Christmas tree that adds a touch of homemade elegance to any tabletop.
What You'll Need:
Green glitter paper or green cardstock, Christmas tree template (or draw freehand), thin cardboard, small pom-poms, gold star stickers/shapes, gold thread, an empty paper roll (toilet paper/paper towel), brown paint, scissors, glue.
Your Crafting Journey:
- Cut the Trees: Print or draw two identical Christmas tree shapes onto your green glitter paper or cardstock. Cut them out carefully.
- Add Rigidity: To make the trees sturdy, cut two identical tree shapes from thin cardboard. Glue one green paper tree to each side of the cardboard tree.
- Decorate the Trees: Embellish both sides of your paper trees with pom-poms, gold stars, and lengths of gold thread (which can be glued on as garlands).
- Create the Trunk: Paint an empty paper roll brown and let it dry. This will serve as your tree's trunk.
- Assemble 3D: Cut two parallel slots about 1 inch deep into the top edge of the painted paper roll, opposite each other. Carefully slide the bottom of your decorated cardboard tree into these slots so it stands upright. The 3D tree is ready to adorn your mantel!
Charming Paper Roll Figures (Reindeer, Snowman, Santa)
Empty paper rolls are fantastic, free canvases for creating a cast of adorable Christmas characters.
What You'll Need:
Empty paper rolls, EVA foam (brown, white, orange, red, black, glitter), white cardstock, small pom-poms, strong glue, adhesive googly eyes, pipe cleaners, pencil, scissors.
Your Crafting Journey (for each character):
- Reindeer:
- Cut antler shapes from brown EVA foam. Glue them to the inside top rim of the paper roll.
- Glue a red pom-pom onto the front as Rudolph's nose.
- Stick on two googly eyes. You can add small ears cut from brown EVA foam.
- Snowman:
- Wrap the paper roll with white cardstock and glue it in place.
- Create earmuffs by bending a pipe cleaner over the top of the roll and gluing a pom-pom to each end.
- Cut a thin strip of EVA foam (any color) for a scarf and glue it around the snowman's "neck."
- Glue on googly eyes, a small orange EVA foam triangle for the nose, and small pom-poms or buttons for the body.
- Draw a smiling mouth with a black marker.
- Santa Claus:
- Cut a strip of red EVA foam to wrap around the bottom two-thirds of the paper roll, gluing it down.
- Cut a beard and mustache from white EVA foam and glue them onto Santa's face.
- Glue on a small pink pom-pom for the nose and googly eyes.
- Form a cone from red EVA foam for his hat, glue it, and then glue a white pom-pom to the tip. Attach the hat to the top of the roll.
- Decorate with a thin strip of glitter EVA foam for a belt buckle or other festive accents. Add pink blush with a marker for rosy cheeks!
- Usage: These can be used as playful decorations, as part of a homemade Christmas bowling game, or even as gift card holders!
Textured Crafts & Cozy Creations
Explore crafts that use softer materials, adding tactile appeal and warmth to your holiday display.
Felt & Garland Christmas Trees (Cones & Scraps)
Build charming tabletop Christmas trees using a cone base and decorating it with scraps of felt, fabric, or paper.
What You'll Need:
Cardstock (or a pre-made styrofoam cone), felt/fabric scraps/EVA foam, small buttons/other tiny adornments, wrapping paper (optional), scissors, glue.
Your Crafting Journey:
- Form the Cone: Roll a piece of cardstock into a cone shape and secure it with glue. Trim the base so it sits flat. Alternatively, use a pre-made craft cone.
- Prepare Decorations: Cut decorative shapes (leaves, stars, circles) from felt, fabric scraps, or EVA foam. You can also cut long, thin rectangles to simulate garlands or strips of wrapping paper.
- Layer and Glue: Starting from the bottom of the cone, glue your chosen decorations in overlapping layers, working your way up to the top. This creates a textured, "foliage" effect.
- Add Details: Once the cone is covered, glue on small buttons, mini pom-poms, or other tiny embellishments to add sparkle and interest. A star can be added to the very top.
Delightful Sock Snowmen (No-Sew Fun)
Transform a plain white sock into an adorable, no-sew snowman—a perfect craft for all ages and a wonderful personalized gift.
What You'll Need:
White sock (crew or tube sock works best), rice (or cotton balls/lentils), ribbon/thread/elastic bands, buttons/pom-poms/felt/fabric scraps, permanent markers, scissors, strong glue.
Your Crafting Journey:
- Fill the Body: Pour rice into the white sock until it forms a plump, stable base for the snowman's body.
- Shape the Snowman: Tie off the top of the rice-filled section with ribbon or thread. Then, gently push down on the rice to create a smaller, distinct section above the body for the head. Tie this section off with another ribbon or thread to define the neck.
- Dress It Up: Use the remaining top part of the sock to create a hat for your snowman, folding or tying it into shape.
- Facial Features: Glue on small buttons or felt circles for the eyes. Cut a small triangle from orange felt for the nose. Use permanent markers to draw a mouth.
- Accessories: Wrap a thin strip of felt or fabric scrap around the neck for a scarf. Glue small buttons down the front of the body. You can even glue small twigs or pipe cleaners for arms.
- Personalize: Let each family member decorate their snowman uniquely. These make charming decorations or heartfelt gifts!
Crafting Success: Tips for a Smooth & Joyful Journey
Crafting should be fun, not stressful. Here are a few tips to ensure your Dibujos de Navidad para Manualidades experience is as delightful as the finished products:
- Start Simple, Build Up: Don't tackle the most complex project first. Begin with something manageable, especially with younger children, to build confidence and enthusiasm.
- Embrace Imperfections: The beauty of handmade items lies in their uniqueness. A crooked eye or an uneven cut adds character, not failure.
- Involve Everyone: Assign age-appropriate tasks. Little ones can glue cotton balls, while older children can handle cutting and more intricate details.
- Safety First: Always supervise children, especially when using scissors, hot glue guns, or small embellishments that could be choking hazards.
- Prep Your Space: Lay down newspaper or a protective mat to make cleanup easier. Have wet wipes or paper towels on hand.
- Encourage Creativity: Provide materials, but don't dictate every step. Let imaginations soar and encourage personal touches. Sometimes the "wrong" way is the most creative way!
- Turn on the Tunes: Christmas carols create the perfect backdrop for a festive crafting session.
Beyond the Craft Table: Displaying and Gifting Your Creations
The journey doesn't end when the glue dries. One of the most rewarding aspects of Dibujos de Navidad para Manualidades is seeing your creations brighten your home or bring joy to others.
- Deck the Halls: Hang your ornaments on the tree, use paper roll figures to create a festive mantel display, or place your sock snowmen on windowsills. The mini shop window makes a charming addition to a shelf.
- Thoughtful Gifts: Handmade items carry immense sentimental value. Your bottle cap pins could be stocking stuffers, a 3D tree could be a gift for grandparents, or a collection of paper roll characters could delight a friend.
- Christmas Card Embellishments: Use smaller versions of your drawings or elements from your crafts to decorate handmade Christmas cards.
- Storytelling: Each craft holds a story. Encourage family members to share their favorite part of making an item, or who they plan to give it to. These stories become part of your family's holiday lore.
Common Questions About Christmas Crafting
Crafting can sometimes spark questions, especially for those new to the world of manualidades. Here are some quick answers to common queries:
- "What if I'm not good at drawing?"
No problem! Many crafts rely on tracing templates or simple shapes. Websites offer free printables, or you can even trace objects around your house (e.g., a cup for a circle). The drawing is just a guide; the craft brings it to life. - "How can I make my crafts last longer?"
Use good quality glue, allow items to dry completely before handling or storing, and consider a clear sealant spray for painted items (adult-only application, in a well-ventilated area). Store delicate crafts carefully in tissue paper or individual boxes. - "My kids lose interest quickly. Any tips?"
Break projects into smaller steps, offering breaks in between. Keep sessions short, focus on immediate gratification (like painting or gluing something quickly), and let them choose aspects of the decoration to personalize. Sometimes, having multiple small projects ready to switch between helps. - "What's a good age to start these crafts?"
Many of these crafts can be adapted for toddlers (with significant adult help for cutting and gluing) and up. Toddlers can enjoy painting, sticking cotton, or tearing paper, while preschoolers can do more simple cutting and gluing. Older children and adults can tackle more intricate details. - "Where can I find free templates?"
Many educational and craft websites offer free printable Christmas templates. A quick search for "Christmas craft printables" or "Dibujos de Navidad para imprimir" will yield a wealth of options.
Ready, Set, Create!
The heart of the holiday season isn't just about what you receive, but what you create and share. Christmas drawings for crafts, or Dibujos de Navidad para Manualidades, are an accessible, joyful gateway to hands-on family fun, personalized decorations, and cherished memories.
So, gather your supplies, put on some festive music, and let your imagination lead the way. Whether you're making a mischievous paper roll snowman, a twinkling 3D tree, or a charming Rudolph with jingly bells, the act of creating together will fill your home with a special kind of holiday magic that lasts long after the lights come down. This Christmas, turn drawings into keepsakes, and moments into memories. Happy crafting!