The holidays are a magical time, filled with warmth, wonder, and a unique visual charm. Learning Cómo Dibujar Temas Navideños isn't just about putting pen to paper; it's about capturing that festive spirit, bringing beloved characters and scenes to life, and creating art that spreads joy. Whether you're aiming to decorate your own cards, create unique gifts, or simply find a relaxing, creative outlet, this guide will walk you through the process, making holiday art accessible and fun for everyone, regardless of your current skill level.
Think of this as your personal art coach, offering clear, easy-to-follow instructions to help you master the art of drawing Santa, festive trees, cozy winter scenes, and so much more. Let's unwrap the magic together!
At a Glance: Your Holiday Drawing Journey
- Start Simple: Master basic shapes – circles, squares, triangles – to build complex figures.
- Gather Your Tools: A pencil, eraser, and paper are all you truly need. Colors are a bonus!
- Break It Down: Each Christmas theme can be drawn step-by-step, making big projects manageable.
- Practice Makes Progress: Don't aim for perfection; enjoy the process and watch your skills grow.
- Embrace Your Style: Use these guides as a foundation, then add your unique creative flair.
- Find Inspiration Everywhere: Christmas decor, movies, and stories are rich sources of ideas.
The Heart of Holiday Art: Why Draw Christmas Themes?
Beyond the simple act of creating, drawing Christmas themes offers a delightful array of benefits. It's a wonderful way to personalize holiday greetings, crafting cards that truly stand out with your unique touch. Hand-drawn gift tags add an extra layer of thoughtfulness, transforming even a small present into something more special. For parents and educators, it's a fantastic activity to share with children, fostering creativity, fine motor skills, and a deeper appreciation for the festive season.
For many, drawing is also a form of mindfulness. The focus required to sketch lines and shapes can be incredibly calming, a quiet escape from the holiday hustle. It’s an opportunity to slow down, express joy, and connect with the very essence of Christmas through visual storytelling. And the best part? You don't need to be an experienced artist to begin. The festive spirit itself is often the best inspiration, guiding your hand as you depict everything from a jolly Santa to a twinkling star.
Your Essential Holiday Art Kit: Getting Started Right
You don't need a professional art studio to start drawing Christmas magic. In fact, some of the most charming holiday art is created with the simplest tools. Here’s what you might find helpful:
- Pencils: A standard HB pencil is perfect for outlines and sketching. For more precise or darker lines, consider a 2B or 4B.
- Eraser: A good quality eraser is your best friend for fixing mistakes and cleaning up guidelines. Kneaded erasers are also excellent for lifting graphite without smudging.
- Paper: Any plain white paper will do! Sketchbook paper offers a slightly better texture, but don't let a lack of "art paper" stop you.
- Coloring Tools (Optional but Fun!):
- Colored Pencils: Easy to control and layer for rich color.
- Crayons: Great for younger artists and bold, vibrant hues.
- Markers: Offer intense color but can bleed through thinner paper.
- Watercolors: For a softer, more ethereal look.
Remember, the goal is to have fun and create. Don't feel pressured to buy expensive supplies. Work with what you have, and upgrade only if you find yourself really enjoying the process and wanting more options.
The Building Blocks of Christmas Art: Mastering Basic Shapes
Every complex drawing, no matter how intricate, is built from fundamental shapes. Understanding this is key to unlocking your drawing potential, especially when tackling diverse Christmas themes. Circles, squares, rectangles, and triangles are your foundational toolkit.
- Circles: Think of Santa's belly, a round ornament, a snowman's body, or the head of a reindeer.
- Squares/Rectangles: These form the basis for gift boxes, fireplaces, house structures, or even parts of Santa's sack.
- Triangles: The classic shape for a Christmas tree, Santa's hat, or mountain peaks in a snowy landscape.
Practice drawing these shapes neatly and consistently. Once you're comfortable, you'll see how easily they can be combined, stretched, and modified to become almost anything you imagine. We'll use this "shapes first" approach throughout our drawing guides.
Drawing Classic Christmas Characters: Bringing Icons to Life
Let's begin by sketching some of the most beloved figures of the holiday season. Each character starts with simple geometric forms, which we then refine into recognizable features.
Santa Claus: From Basic Shapes to Jolly Old Elf
Santa is the undisputed symbol of Christmas joy. His iconic look is surprisingly easy to break down.
- Start with the Body: Lightly sketch a large oval for his body. Below that, add two smaller ovals for his legs and feet, slightly wider at the bottom.
- The Head and Hat: Above the main body oval, draw a smaller circle for his head. On top of the head, sketch a large, pointed triangle for his hat, letting it droop slightly to one side. Add a small circle at the tip for the pompom.
- Facial Features and Beard: Divide the head circle vertically and horizontally with faint guidelines. Place two small ovals for eyes on the horizontal line. Below them, a larger oval for his nose. Now, draw a large, fluffy cloud-like shape around his nose and mouth area for his beard, connecting it down to his chest.
- Hands and Sack: Sketch two simple mitten-like shapes for his hands. One might be holding his sack, which can be a large, rounded rectangle or oval peeking out from behind him.
- Refine and Detail: Now, go over your sketch, refining lines. Add the fur trim to his hat and coat, a big belt with a buckle around his waist, and the characteristic wrinkles in his suit. Erase your initial guidelines and any unnecessary lines.
- Coloring: Santa is traditionally red for his suit, white for his beard and fur trim, and black for his boots and belt. A touch of pink for his cheeks adds to his jolly appearance.
Rudolph and Friends: Crafting Reindeer Charm
Rudolph, with his glowing nose, leads the sleigh! Drawing reindeer involves graceful lines and distinct features.
- Basic Body Structure: Start with two ovals – one larger for the body and a slightly smaller one for the chest, connecting them with a curved line.
- Head and Neck: Draw a small oval for the head, connected to the chest oval by two slightly curved lines forming the neck.
- Legs and Tail: Sketch four long, slender lines for the legs, ending in small hoof shapes. Add a small, fluffy oval for the tail at the back.
- Ears and Antlers: On top of the head, add two leaf-like shapes for ears. For antlers, draw two inverted 'Y' shapes emerging from the top of the head, branching out.
- Facial Features: Place two small circles for eyes, an oval for the snout, and two tiny lines for the mouth. If it's Rudolph, add a prominent red circle for his nose!
- Refine and Detail: Smooth out the body lines, add muscle definition to the legs, and refine the antlers to look more organic. You can add a collar or harness if you like.
- Coloring: Reindeer are typically shades of brown, with a lighter belly. Rudolph's nose, of course, is a bright, cheerful red.
Snowmen: Simple Spheres, Big Personality
Snowmen are one of the simplest and most customizable Christmas drawings.
- Stacked Circles: Draw three progressively smaller circles stacked on top of each other. The largest at the bottom, the smallest at the top. Don't worry about perfect circles; slight wobbles add character.
- Facial Features: On the top circle, add two small circles for eyes and a row of dots or small circles for the mouth. For the nose, draw a carrot shape.
- Arms and Accessories: Sketch two stick-like arms emerging from the middle circle. Add a tall hat (rectangle with a brim) and a scarf (two wavy rectangles) around the snowman's neck.
- Buttons: Draw two or three small circles or dots down the middle of the snowman's body for buttons.
- Refine and Detail: Add some texture to the snow by drawing tiny curved lines, indicating where snow piles up. You can add shadows to give it dimension.
- Coloring: White for the snow, orange for the carrot nose, black for eyes and buttons, and whatever festive colors you like for the hat and scarf!
Festive Decorations and Symbols: Adding Holiday Charm
Christmas isn't just about characters; it's about the dazzling array of decorations that transform our homes and streets. Let's learn how to draw some of these iconic elements.
The Perfect Christmas Tree: A Symbol of the Season
A classic evergreen, laden with ornaments, is a cornerstone of holiday imagery. The key is its triangular form.
- Basic Triangle: Start with a tall, slightly uneven triangle as your primary guide. Below it, draw a small rectangle for the trunk.
- Layered Branches: Instead of drawing a straight outline for the triangle, create three or four tiers of wavy, slightly overlapping lines within the triangle to suggest the tree's layers of branches. Start wider at the bottom and narrow towards the top.
- Foliage Texture: Add small, jagged lines or short strokes along the edges of your tiered branches to mimic the texture of pine needles.
- The Star: On top of the tree, draw a prominent five-pointed star.
- Decorations: This is where the fun begins! Draw small circles for baubles, wavy lines for tinsel, and tiny lightbulb shapes for fairy lights. You can also add bows or candy canes.
- Refine and Detail: Darken your branch lines, add a few pine needles scattered around the base, and perhaps a present or two.
- Coloring: Varying shades of green for the tree, brown for the trunk, yellow for the star, and a rainbow of colors for the ornaments and lights.
Ornaments and Baubles: Adding Sparkle to Your Scene
These festive spheres are perfect for practicing shading and simple reflections.
- Basic Shape: Start with a perfect circle for a simple bauble. For other ornaments, try ovals, teardrops, or even more complex shapes like bells.
- The Cap: At the top of your ornament, draw a small rectangle with a tiny loop on top for the hanger.
- Reflections (Optional but Impactful): To make it look shiny, add a few small, irregular white or very light grey shapes on one side of the ornament. These represent light reflecting off the surface. A slightly darker shade on the opposite side will give it depth.
- Patterns and Textures: You can add stripes, polka dots, glitter textures (tiny dots), or even simple designs like snowflakes to your ornaments.
- Coloring: Think jewel tones – deep reds, emerald greens, sapphire blues, and golds. The reflections should be the color of the light source, often white or yellow.
Candy Canes and Gifts: Sweet Touches of Holiday Cheer
These items instantly evoke the sweetness and generosity of the season.
Candy Canes:
- "J" Shape: Draw a tall 'J' shape.
- Thickness: Mirror the 'J' shape a little distance away to give it thickness, connecting the ends.
- Stripes: Add diagonal lines across the candy cane.
- Coloring: Alternate red and white stripes for the classic look.
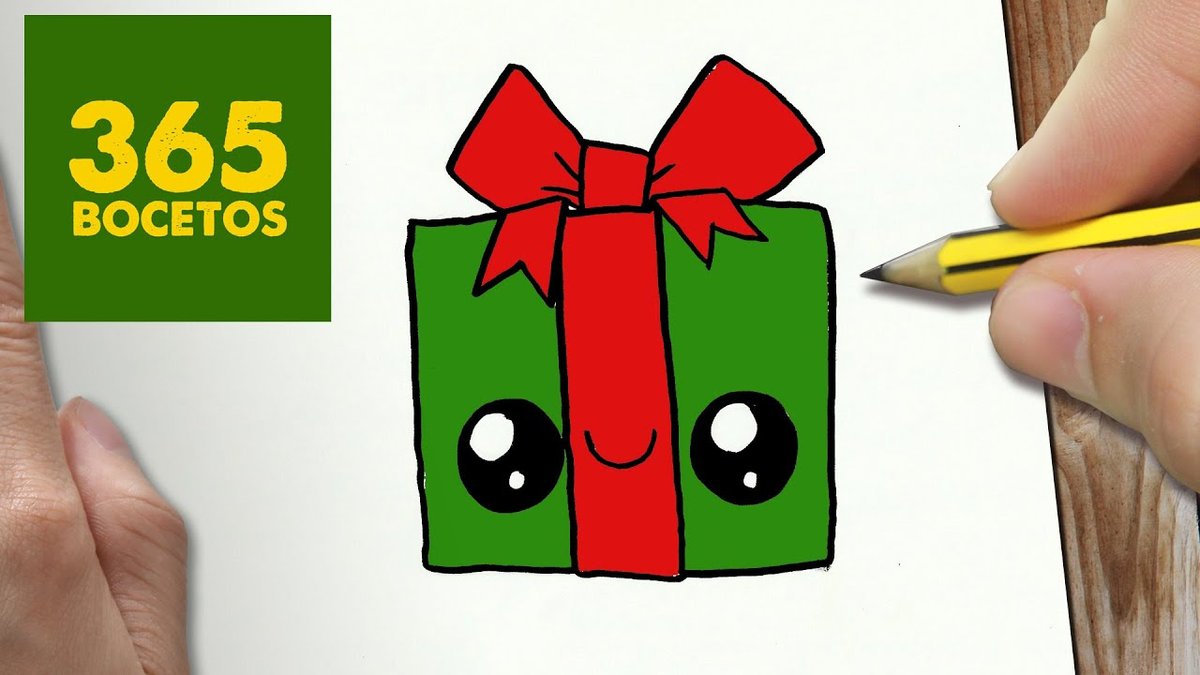
Gifts: - Cube or Box: Start by drawing a simple cube or rectangle. You can show perspective by drawing a front face and then extending lines back to create the top and side faces.
- Ribbon: Draw two perpendicular lines across the top and sides of the box for the ribbon.
- Bow: On top, draw a simple bow by sketching two loops (ears of the bow) and two tails.
- Coloring: Use bright, festive wrapping paper colors, and contrasting colors for the ribbon and bow.
Bells and Holly: Iconic Holiday Accents
These simple additions can quickly elevate your Christmas compositions.
Bells:
- Bell Shape: Draw a slightly squashed oval at the top, which narrows into a wider, rounded bottom.
- Clapper: Inside the bottom opening, draw a small circle hanging from a tiny line – this is the clapper.
- Ribbon/Bow: Add a simple ribbon or bow at the top where the bell hangs.
- Coloring: Gold or silver for the bell, and vibrant red or green for the ribbon.
Holly: - Leaf Shape: Draw a leaf with three or four distinct, pointed lobes on each side.
- Berries: Add two or three small circles clustered together at the base of the leaves for the berries.
- Coloring: Dark green for the leaves and bright red for the berries.
Need more inspiration or step-by-step guides for other festive items? Check out Our Christmas drawing collection for a treasure trove of ideas and instructions, perfect for all ages and skill levels.
Capturing Winter Wonderland Scenes: More Complex Compositions
Once you're comfortable with individual elements, combine them to create enchanting winter scenes. These often involve perspective and layering.
Cozy Christmas Houses: Warmth in the Snow
A snow-covered cottage glowing with warmth is a classic festive image.
- Basic Structure: Start with a simple square or rectangle for the main body of the house. On top, add a triangle for the roof.
- Details: Add a rectangular door and square or rectangular windows. You can draw cross-sections in the windows to indicate panes.
- Chimney: On one side of the roof, draw a small rectangle for the chimney.
- Snow: This is crucial. Instead of drawing straight lines for the roof and ground, use wavy, lumpy lines to represent snow piling up on the roof, windowsills, and the ground around the house. Add a few snowdrifts.
- Smoke: From the chimney, draw a few wispy, curly lines for smoke, indicating a warm fire inside.
- Background Elements: Add a few simple pine trees in the distance (using the tiered triangle method), and perhaps a low fence.
- Coloring: Warm yellow light emanating from the windows, white snow, brown or red for the house, and green for the trees.
Simple Snowflakes: Unique Designs, Endless Possibilities
Each snowflake is unique, making them a fun exercise in symmetrical design.
- Crosshairs: Start with a simple 'X' shape or a '+' sign, drawing four or six lines radiating from a central point. These are your main arms.
- Branches: Along each arm, add smaller, symmetrical branches. These can be tiny 'V' shapes, dots, or small lines.
- Tips: Experiment with different shapes at the very end of each arm – tiny arrows, circles, or forks.
- Symmetry is Key: Try to keep your additions symmetrical on each arm for a balanced look.
- Coloring: Snowflakes are almost always white or a very pale blue, perhaps with a slight shimmer effect if you're using glitter.
Designing a Festive Wreath: Nature's Embrace
Wreaths symbolize welcome and endless holiday cheer.
- Main Circle: Lightly draw a large circle as your guide. Inside it, draw a slightly smaller circle to define the thickness of your wreath.
- Greenery: Fill the space between your two circles with overlapping, short, jagged lines to represent pine needles or other evergreen foliage. Don't make it too neat; a bit of wildness looks natural.
- Ribbon/Bow: Add a prominent bow at the top or bottom of the wreath. You can make it a simple bow or a more elaborate multi-loop one.
- Embellishments: Incorporate small holly leaves and berries, tiny pinecones (small overlapping scales), or even miniature ornaments nestled within the greenery.
- Hanger: Draw a loop or ribbon at the very top for hanging.
- Coloring: Dark and medium greens for the foliage, bright red for berries and the bow, and natural browns for pinecones.
Beyond the Basics: Adding Your Personal Touch
You've learned the fundamental steps for various Christmas themes. Now, let's explore how to elevate your drawings and truly make them your own.
Coloring Your Creations: Bringing Life to Your Drawings
Color is where your drawings truly come alive. While traditional Christmas colors are popular, feel free to experiment.
- Traditional Palette: Reds (Santa, berries), greens (trees, holly), whites (snow), gold/silver (stars, ornaments).
- Shading for Depth: Don't just color flat. Imagine where light is coming from and add darker shades on the opposite side to create shadows. For example, a round ornament should have a darker edge opposite its highlight.
- Layering Colors: With colored pencils, you can layer lighter colors first, then gradually add darker shades to build richness and depth.
- Blending: Use a colorless blender pencil or even a white crayon (for waxy mediums) to smooth out transitions between colors.
- Highlights: A pure white spot or a tiny streak of uncolored paper can make an eye or an ornament truly sparkle.
Developing Your Style: Making Each Drawing Uniquely Yours
The beauty of art is its individuality. As you practice, you'll naturally develop a "style."
- Experiment with Line Weight: Some artists use thick, bold lines; others prefer delicate, thin strokes. Try both!
- Personalize Details: Maybe your Santa has a particularly bushy beard, or your snowman sports a quirky mismatched scarf. Don't be afraid to deviate from the standard.
- Simplify or Elaborate: Some prefer a minimalist, cartoonish style; others love intricate detail. Find what feels right for you.
- Signature Element: Perhaps you always add a tiny star, or a unique swirl to your snowflakes. These small touches can become your artistic signature.
- Study Other Artists: Look at different illustrators' interpretations of Christmas themes. What do you like about their work? Can you adapt any elements into your own?
Overcoming Common Drawing Challenges
Even experienced artists face hurdles. Here's how to navigate some common frustrations:
- "My drawing doesn't look like the reference!": That's okay! Art is interpretation, not photocopy. Focus on capturing the essence rather than exact replication. Your unique hand will always shine through.
- Proportion Problems: If something looks "off," step back. Sometimes looking at your drawing in a mirror or holding it up to the light can reveal where proportions are skewed. Use light guidelines for relative sizes.
- Symmetry Struggles: Drawing perfectly symmetrical objects (like snowflakes or bell designs) can be tough. Don't press too hard. Sketch lightly, and use a ruler or compass for initial guides if needed, then freehand the details.
- "I can't draw straight lines/perfect circles!": No one can, perfectly. Embrace the slight wobbles; they give your art a hand-drawn, human quality. If precision is critical, use tools for initial construction, then draw over them freehand.
- Detail Paralysis: Don't get stuck on tiny details too early. Work from big shapes to small details. Get the overall form right first, then gradually add the intricacies.
Frequently Asked Questions About Drawing Christmas Themes
Q: I'm a complete beginner. Where should I start?
A: Start with the simplest shapes! The snowman is an excellent first project, followed by a basic Christmas tree or a gift box. Focus on light pencil strokes and building confidence.
Q: How do I make my drawings look 3D instead of flat?
A: Shading and perspective are key. When drawing an object, consider where a light source would hit it. The side facing away from the light will be darker, and you can add a small highlight on the side closest to the light. For perspective, make objects further away slightly smaller and lighter.
Q: What if I don't have many colors? Can I still make good drawings?
A: Absolutely! Line art itself can be incredibly powerful. Try using just a black pen on white paper for a graphic, impactful look. Or experiment with limited palettes, like only using reds and greens, or just shades of blue for a winter scene.
Q: How can I make my drawings look more festive or magical?
A: Incorporate elements like sparkles (small stars or dots), glowing effects (a lighter halo around lights), and dynamic poses for characters. Exaggerate features like Santa's smile or a reindeer's leap. Don't forget the power of color and contrast!
Q: Is there an age limit for learning to draw Christmas themes?
A: None whatsoever! Drawing is a lifelong skill and a joyful pastime for all ages. Simple guides are perfect for young children, while more complex scenes can challenge teens and adults. The goal is always creative expression and enjoyment.
Your Next Artistic Step for the Holidays
You now have a solid foundation for bringing the magic of Christmas to life on paper. From the jolly figure of Santa to the serene beauty of a snow-covered house, these techniques are yours to explore and adapt.
The most important takeaway? Enjoy the process. Don't let the pursuit of perfection overshadow the simple joy of creating. Every line you draw, every color you choose, contributes to a unique piece of holiday art. So grab your pencil, put on some festive music, and let your imagination soar. Your holiday masterpieces are just a few strokes away, ready to spread cheer and warmth this season. Happy drawing!